If you live in a climate that regularly dips below freezing during the winter it is highly recommended that you winterize your sprinklers. If you don’t winterize them then you may have more expensive repairs to deal with later on.
Failing to properly prepare your irrigation system and sprinklers for the coldest part of the year will result in lots of damage and leaks that only become visible during the spring when you turn your irrigation back on.
Let’s explore this topic in greater depth however because there are some additional reasons why winterization is important even if you don’t expect leaks or burst pipes and/or hoses.
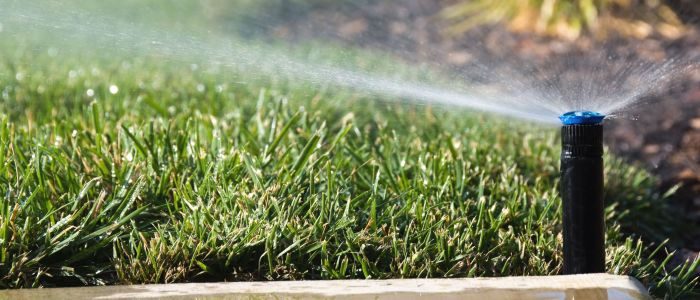
Failure to Winterize Sprinklers
While you may get lucky if you do not winterize your sprinkler system and avoid causing any significant damage due to the system residing underground and being below where the ground freezes. The year your luck runs out will result in costly repairs.
Having to dig up your lawn in the spring due to irrigation lines that broke is the worst. Your lawn will be damaged and require overseeding grass in the spring and there is a good chance you will be out hundreds if not thousands of dollars depending on how many irrigation zones get damaged.
It does not take that much water in a line to expand beyond the capacity of the line to break the hose or pipe.
Reasons Sprinklers Do Not Need to be Winterized
Most homeowners will want to winterize their sprinklers. The only exception to this rule is for people that live in climates that never go below freezing 32 degrees Fahrenheit / 0 degrees Celsius. Most of the United States dips below freezing at some point during the winter so please take the time to properly winterize your sprinklers and irrigation lines to avoid costly damage.
For the few people that live in climates that never freeze you can stop reading here, but for everyone else the following guide will walk you the steps for winterizing your sprinklers and hoses for winter and additional details on why this is so important to do before the temps start to drop. Nothing is worse than an early frost in the late fall that causes a burst in your pipes, hoses, or sprinklers when you still had the water turned on resulting in a massive water leak.
Sprinkler Winterization Plan
Depending on your climate your winterization plans may vary slightly for your irrigation system. For homeowners that live in temperate climates with vary limited days that dip below freezing you may be able to simply open up a manual drain valve and release part of the water in the system. Then disconnect the irrigation line by closing the mainline so they are not full of water in case of a rare cold night that could cause a freeze.
Most lines in temperate climates will be installed below the freezing level of the ground, so even with temperatures dipping below freezing occasionally the ground itself will never freeze
Everyone else should follow the following a more rigorous winterization process that will remove most of the water that settles in the lines in between use. This residual water if not removed is what freezes and causes significant damage to irrigation system. The steps to completely drain an irrigation sprinkler system to prevent damage are straightforward and can be done by the homeowner or hired professional if needed.
How to Winterize Sprinklers
Depending on your irrigation system you may want to have a professional assist with the winterization steps, especially if you are a new homeowner trying to winterize a system that you are unfamiliar with. An irrigation pro can help you learn the ins and outs of your system and make sure that you are educated on the process for future years. In order to do it properly you will need an air compressor to blow out the sprinklers.
Automatic Irrigation Systems
- Shut off the mainline valve by closing it.
- Keep an irrigation zone that is the furthest down your system open so that the water pressure on the mainline is relieved. It is important that while running the air compressor element to drain the line that the zone valve is kept open.
- Using the quick hose coupler valve attach the hose from your air compressor to the irrigation system.
- Set the pressure on your air compressor to 50 pounds per square inch. Some compressors you will need to watch the PSI gauge and turn off the compressor when it reaches the 50 PSI mark.
- Allow the air in the compressor to be sent into the system. You should see all the sprinkler heads pop up and begin to emit the residual water in the system in that furthest zone.
- After a couple of minutes have past switch the controller to the next zone, keep the controller on and systematically go from zone to zone until they have all been blown out with air removing the water.
- Go through the cycle again and sometimes you may even need to do this multiple times until only a fine mist of water gets emitted from the sprinkler heads.
- Turn off the compressor after most of the water has been expelled from the system.
- Disconnect the compressor from the irrigation system with the hose quick valve coupler.
- Turn off the controller for your irrigation system.
Manual Irrigation Systems
Draining the irrigation lines for a manual irrigation system is like an automatic system, however you will need to manually adjust the zone valves.
- Shut off the mainline by closing the valve.
- Select the irrigation zone control furthest from the air compressor value and open the manual shutoff handle to relieve the water pressure that is present in the mainline. Always make sure at least one zone is open while running your air compressor while connected to the system.
- Set up the air compressor and attach the hose to the quick hose valve coupler.
- Set the pressure on your air compressor to 50 pounds per square inch. Some compressors you will need to watch the PSI gauge and turn off the compressor when it reaches the 50 PSI mark.
- Allow the air in the compressor to be sent into the system. You should see all the sprinkler heads pop up and begin to emit the residual water in the system in that furthest zone.
- After a couple of minutes have past switch the controller to the next zone, keep the controller on and systematically go from zone to zone until they have all been blown out with air removing the water.
- Go through the cycle again and sometimes you may even need to do this multiple times until only a fine mist of water gets emitted from the sprinkler heads.
- It is important on a manual system that the pressure in the lines are allowed can dissipate before closing the valves.
- Disconnect the compressor from the irrigation system with the hose quick valve coupler.
- Close any valves that were still open for zone controls.
Additional Irrigation Winterization Steps
- Insulate all the above ground plumbing to your irrigation system. This includes the lawn irrigation backflow preventers and the valve systems that are above ground. Most people use pipe insulation tape or pipe warmer insulation pouches and covers. Temperate climates that get limited freezes can simply cover the system with a blanket and tarp on a cold night.
- Remember to cover your outside spigots with a foam covering to prevent your pipes from breaking. This is a great tasks to include in your winterization plan for your sprinkler system, while not completely related it is a good idea to do these tasks at the same time during the fall / early winter to avoid winter damages.
It does not take long to winterize a sprinkler irrigation system so don’t put the task off as the winter approaches. Get the task done before the temps start to drop significantly because one cold front moves in early and you will be regretting not taking take care of your irrigation system properly with costly repairs in the spring.